

Bleeding
Tools
- Use only new DOT 4 brake fluid. Container quantity: 1 litre = 000.043.203.66. 30 litres = 000.043.203.67.
- 11MM wrench, bleeder pump (optional), Turkey baster, hose/container to collect fluid pumping out
- The brake fluid change interval is two years, using Super DOT 4 brake fluid (you can use Valvoline Synthetic)
- Open the reservoir.
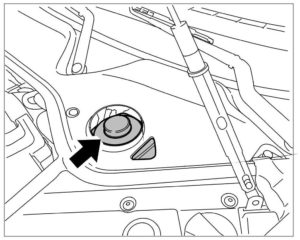
- Use the “turkey baster” (kitchen tool) to take old fluid down to the MIN mark only. Re fill with fresh fluid. Connect a bleeding device to the brake fluid reservoir. Switch on the bleeding device. Pump it (5-7 lbs is pleanty)… Note, I only used the power bleeder for the pressure and had to keep re filling the reservoir. Don t let it go past MIN.. or you can put fresh fluid in power bleeder and it will keep the reservoir full.

Information
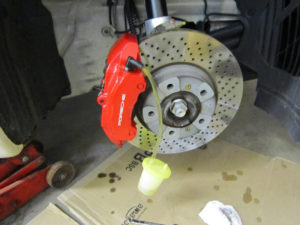
- Always bleed both bleeder valves on the brake caliper.
- Bleed the outer bleeder valve first.
- Each brake caliper had two 11MM nipple nuts on the top. Start with the rear right inside nut. Open and have hose connected to collect fluid. Do not turn the nut too many times or it may come out. Fill the small container and tighten nut. Do not over tighten. Then do outside nut and move to the other rear wheel and repeat. Always check power bleeder and reservoir to avoid running out of fluid. You do not want air inside the system.
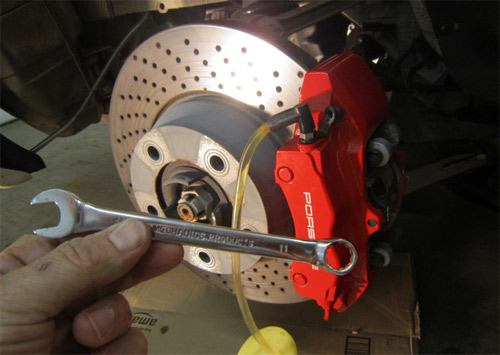
Front V (Below) - Continue the bleeding procedure at the brake calipers. Do so in the following sequence: rear right/rear left/front right/front left.
- Use a transparent hose and a collecting bottle to check the escaping brake fluid is clean and free of air bubbles and to determine the amount of brake fluid used.
- Open each bleeder valve until clear, bubble-free brake fluid emerges.
- Tighten the bleeder valves to the specified tightening torque and remove the bleeder hoses.

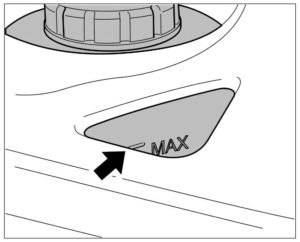
- Remove bleeding device from brake fluid reservoir and screw cap on. The brake fluid level in the brake fluid reservoir must be between the MIN and MAX markings once the vehicle has been filled and bled. Adjust the brake fluid level if necessary.

- Generate vacuum in brake booster by starting engine. Check brake-pedal travel and pedal feel.
Notes: Always use sealed bottles of brake fluid. Open containers are subject to moisture.
I cleaned wheels while off and left the calipers under pressure after bleeding to ensure no leaks.
If its your first time I can not stress enough not to let the system go below the MIN mark during this procedure.
Checking after bleeding
Information
- If the pedal travel is too long or the pedal feels too soft when applied, carry out the following procedure.
- Two workers are required for this.
- Also carry out this procedure if the brake hydraulic system was largely empty.
Connect a bleeding device to the brake fluid reservoir. Switch on the bleeding device. Bleeding pressure is approx. 2.0 bar.
- Open bleeder valve at rear on right-hand side, then push the brake pedal all the way down about 5 times and tap the brake caliper gently several times with a rubber hammer during the bleeding process.
- Hold for 2 – 3 seconds after each depression, then release pedal slowly. After applying pedal for the fifth time, hold pedal down and close bleeder valve.
- Repeat this procedure in the sequence rear left/front right/front left.
- Tighten the bleeder valves to the specified tightening torque and remove the bleeder hoses.
- Remove bleeding device from brake fluid reservoir; correct brake fluid level is necessary.
- Generate vacuum in brake booster by starting engine. Check brake-pedal travel and pedal feel.


")

")


")
")

