

1. Lift the vehicle. How to lift vehicle safely with air suspension – Here
2. Remove the wheel.
- Do not open the brake system.
- Do not loosen the brake hose from the brake caliper when loosening the brake caliper.
- The core of the warning contact wire must not be left exposed! It does not matter if the insulation is worn.
- If necessary, remove a little brake fluid from the reservoir by suction in order to prevent an overflow when the disc brake pads are pushed back.
- To gain better access for removal of the brake caliper, turn the steering fully either to the right or left.
- Protect brake caliper from paint defects using a suitable cloth
- Release and unclip the connector for the brake pad wear indicator -A- and remove it from the holder -B- .
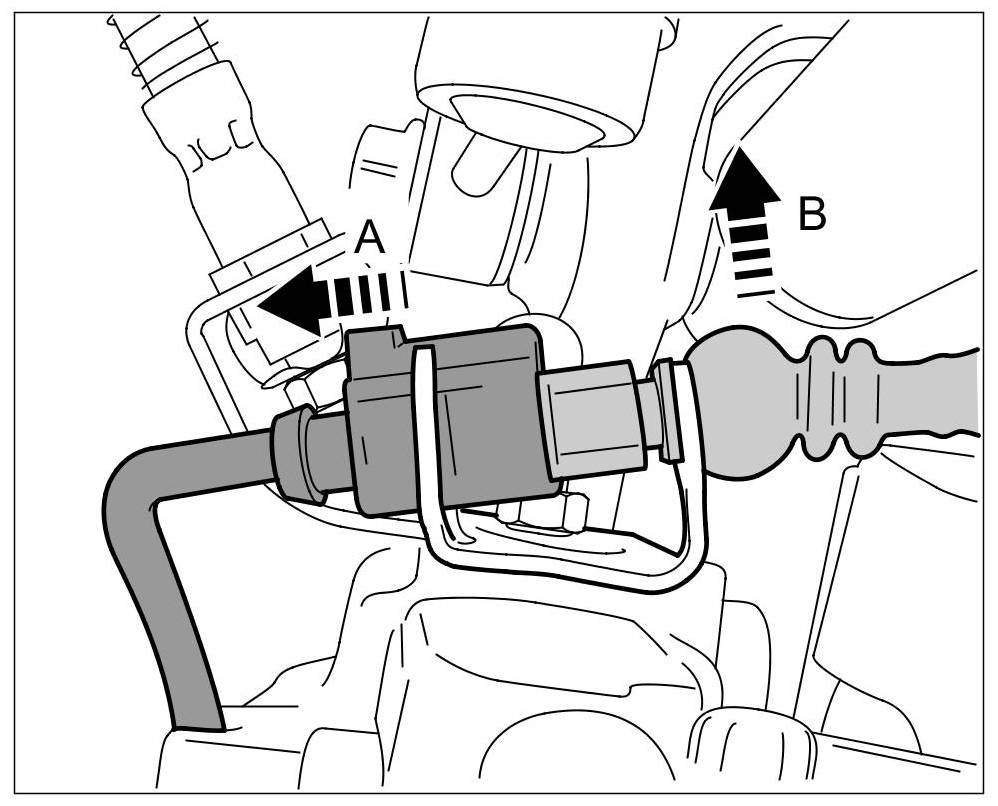 Connector, brake pad wear indicator
- Evenly set back brake pads a little using water pump pliers.
- Loosen fastening screw -1- in the holder for the brake pad wear indicator cable and for the brake line from the brake caliper.
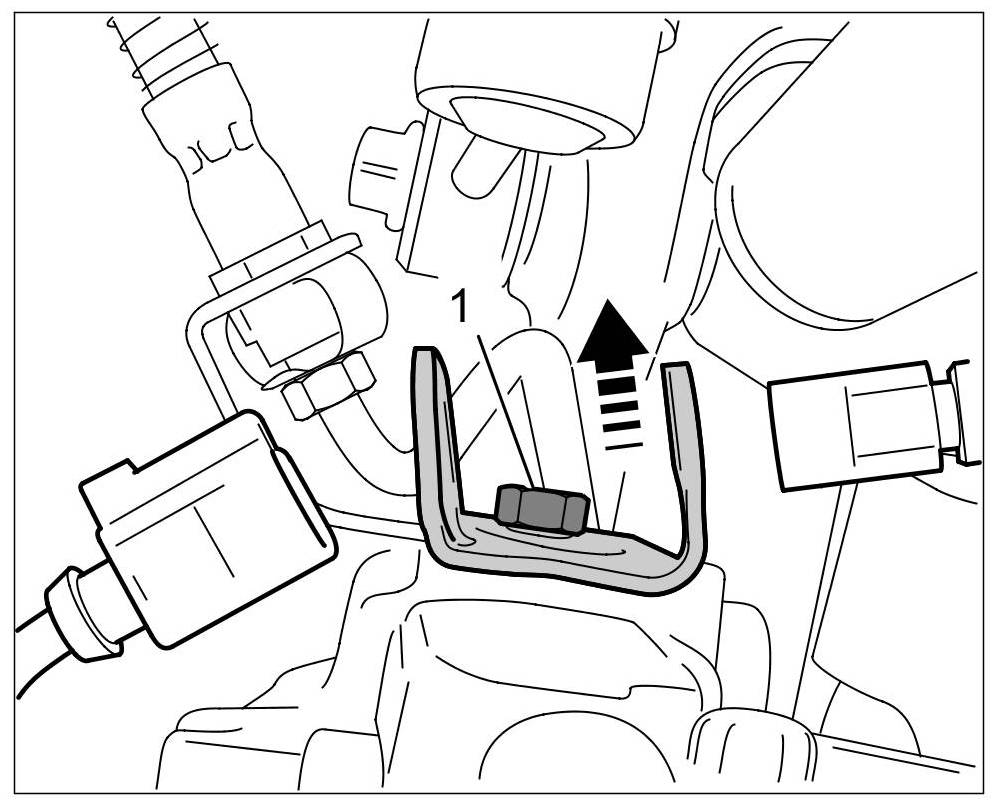 Brake line holder
- Disconnect the brake line on the brake caliper and collect the brake fluid in a suitable container. => Brake line on brake caliper
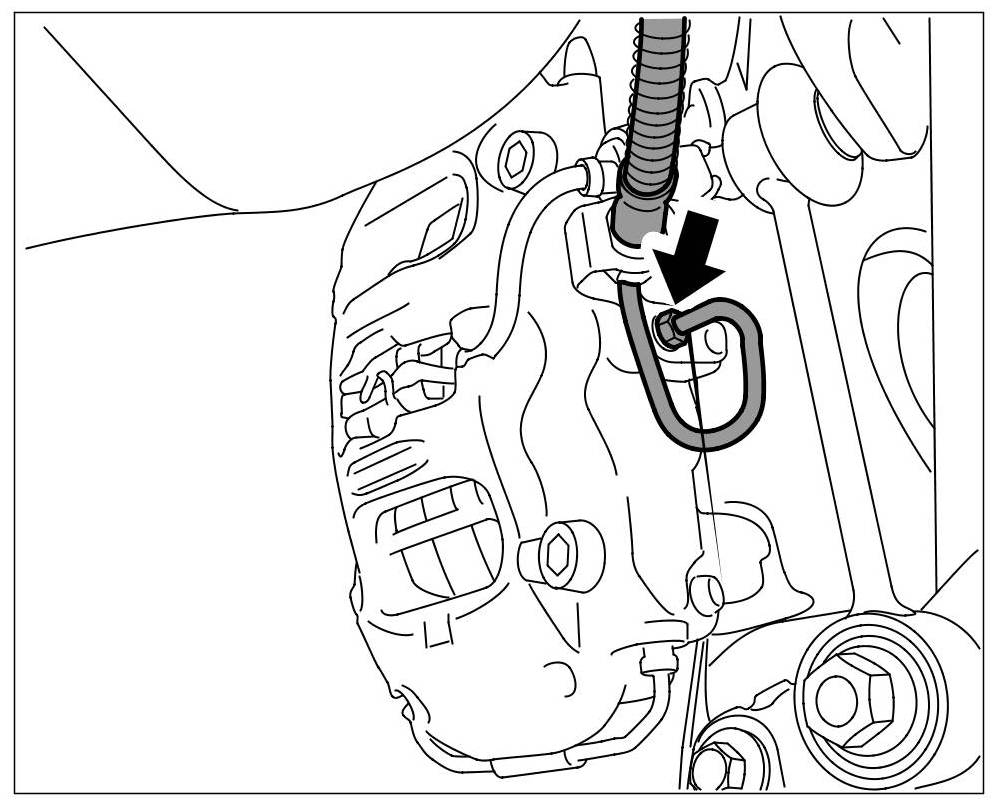 Brake line on brake caliper
- Close off the brake line with a suitable plug.
- Never use an impact bolter to loosen and tighten the brake caliper on the wheel carrier.
- Remove brake caliper from wheel carrier.
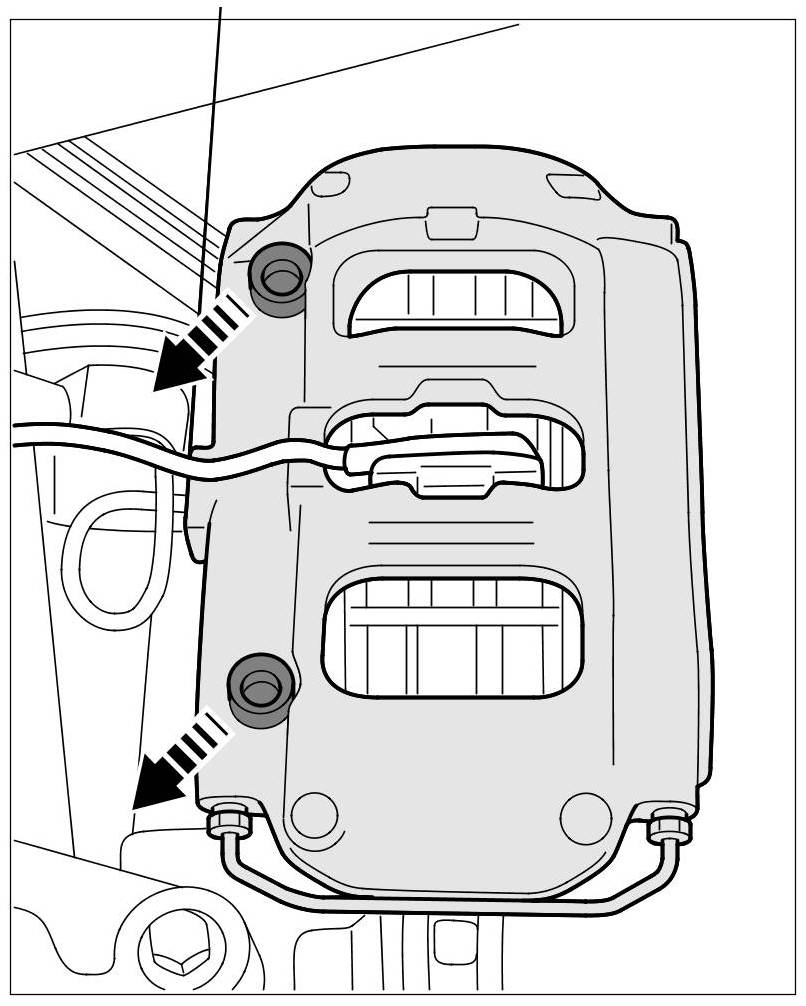 Brake caliper fastening screws
Installing rear brake caliper
The brake caliper is installed in reverse order.
- Replace screws.
- Never use an impact bolter to loosen and tighten the brake caliper on the wheel carrier.
- Observe correct tightening torques -> 4X00IN Tightening torques for the brake system
- Check that all parts are in perfect condition (visual inspection) and replace them if necessary.
- Fit the brake caliper.
- Fit the brake line to the brake caliper.
- Fit the holder for the brake pad wear indicator cable and for the brake line to the brake caliper.
- Clip in the connector for the brake pad wear indicator.
- Position disc brake pads by operating the brake several times.
Subsequent work
- Bleed the brake system. -> 470107 Bleeding brake system – see Bleeding Panamera Brakes
- Fit the wheel. Use assembly aids to help yourself align the holes (assembly pins) .
Bedding in the brake parts
New brake pads require a bedding-in period of approx. 200 km (124 miles)! Only then do they achieve their best friction and wear coefficient! During this period, the brakes should only be subjected to full stress at high speed in emergencies!
Read on: How to bed in your brakes ?

")


")
")

